Halloween!..
Confesso que já achei mais piada do que acho agora, a ideia de as bruxas andarem entre nós é atractiva, mas ao mesmo tempo ponho-me a pensar se não é mais uma forma de incentivar o consumismo e o desperdício.. Há mais ou menos uma década devo ter começado a celebrar o Halloween e sempre fiz os meus disfarces com roupas velhas, minhas, usadas ou compradas em 2ª mão ou feitas com cartões e sempre me diverti muito a fazer isso. Tal como no Carnaval, nunca fui de comprar fatos e máscaras de propósito e se comprar algum adereço, guardo numa caixa que tenho, onde ano após ano, vou vasculhar e procurar uma fantasia apropriada! Reciclo e Re-uso! #DesperdícioZero
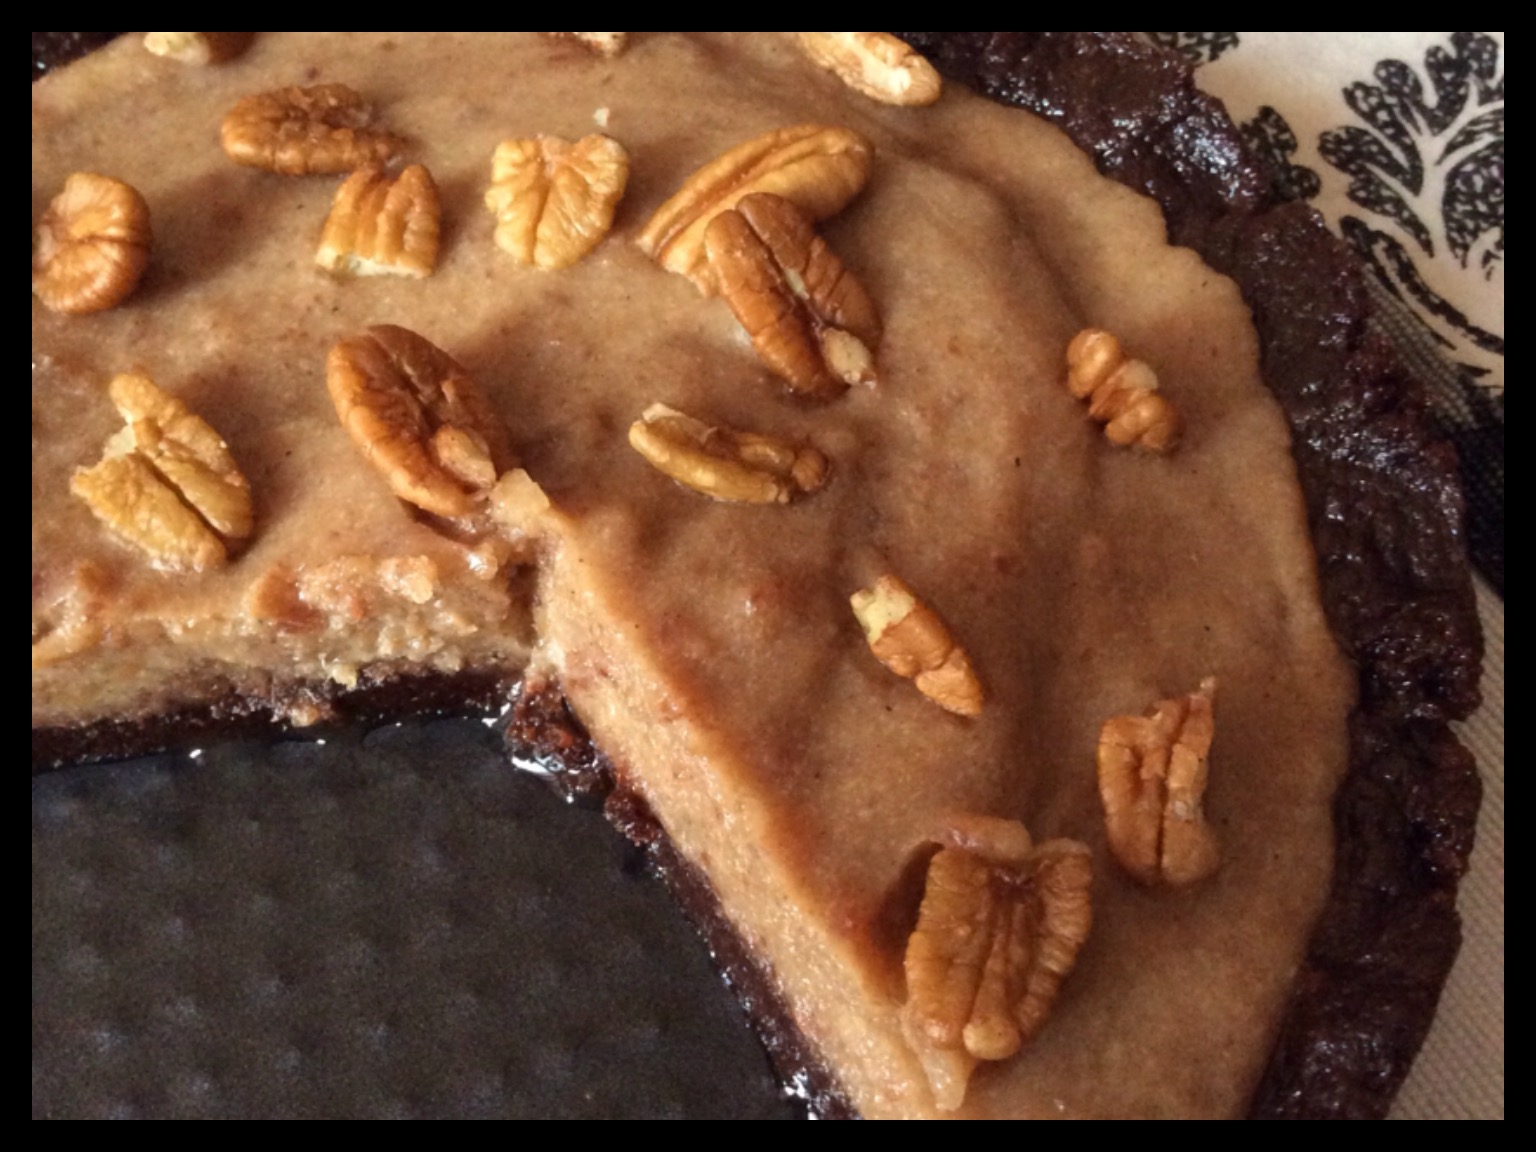
Mas o que gosto bastante em qualquer feriado, é que é sempre uma óptima desculpa para cozinhar e fazer qualquer coisa diferente! :) Este ano experimentei fazer uma "Tarte Crua de Abóbora". Já tinha feito uma anteriormente para os meus anos e adorei a simplicidade e facilidade de execução. E obviamente, o sabor!! Tenho andado a seguir alguns blogs e youtube de modos de vida e receitas saudáveis e descobri este. Tem receitas muito simples e fáceis de fazer, saudáveis e cheias de sabor, vale a pena dar uma olhadela. E que me deram inspiração para fazer esta tarte! A abóbora que usei é uma Hokkaido, laranja-cor-de-Halloween, biológica! Agora existe em todo o lado, mas esta receita pode ser feita com qualquer tipo de abóbora.
Fica a receita para quem quiser experimentar e estejam à vontade para mudar de frutos secos ou alterar as especiarias! A ideia é cada um dar-lhe um toque especial! ;)
Tarte Crua de Abóbora (Faz cerca de 10 fatias)
- Ingredientes
8 tâmaras, sem caroço (demolhadas em água quente cerca de 10 minutos)
1/4 c. chá de extracto de baunilha (usei um que fiz com vodka russa, yummy!)
1/4 c. chá de sal
1-2 c. sopa de água
Recheio:3 xícaras de abóbora picada finamente
1 1/2 xícara de leite de coco
20-25 tâmaras, sem caroço
1/2 xícaras adoçante preferido (usei mel)
1 c. sopa de extracto de baunilha
2 c. chá de gengibre, em pó
2 c. chá de canela, em pó
1 c. chá de noz moscada, em pó
1/8 c. chá de açafrão-das-índias, em pó
1/8 c. chá de sal
- Preparação:
2. Adicionar os restantes ingredientes e ir pulsando até obter uma massa em grânulos, que seja fácil de moldar com os dedos, adicionar água aos poucos, se necessário - colocar essa massa numa forma redonda, de fundo amovível, com cerca de 20 cm de diâmetro, por forma a cobrir o fundo uniformemente e as paredes da forma. Reservar.
3. Recheio: Descascar a abóbora e retirar as sementes (podem e devem ser tostadas e dão um óptimo snack!) e picar num robot de cozinha.
4. Adicionar todos os ingredientes e processar até obter uma massa cremosa. Colocar no topo da base e levar ao frigorífico, no mínimo 6 horas ou durante a noite. Decorar a gosto.

Linda e saborosa!!!!
E nada se desperdiça! Com o que sobrou da abóbora, que comprei uma grande, ainda vou fazer sopa e um caril com batatas!!
O dia de hoje também me faz pensar que há 5 anos vim morar para Helsínquia.. Ao início foi fantástico! Apesar de já andar por este país há mais anos, vinha morar mais definitivamente e no dia em que cheguei começou a nevar. Foi um Inverno bom, não típico para o sul da Finlândia nevar naquela altura, mas bom porque começou a never em Outubro e o Natal foi um Natal branco, cheio de neve e lindo! O que contribuiu ainda mais para a excitação, porque eu sendo de Lisboa, nunca tinha visto neve!! Este ano ainda não neva e as sensações estão mais calmas.. Cada vez mais saudades de Portugal, mas vou distraindo-me na cozinha com novas experiências!
As nostalgias continuam. Há quase um ano atrás iniciei este blog porque fiquei sem congelador. A esta altura não tenho, não o arranjei e tenho conseguido viver sem ele! Forçou-me a controlar a porção de comida que compro, para evitar que se estrague e ainda tenho arestas a limar na parte de cozinhar - de alguma forma acho que vivem mais 3 pessoas comigo e cozinho quantidades absurdas!! E durante este ano houve muitas peripécias, o verão foi particularmente difícil, porque não podia comprar gelados, ou arriscava a ter uma overdose por comer uma embalagem inteira e o consumo de smoothies com frutas congeladas também diminuiu, mas fui arranjando alternativas, sempre a testar, errar, aprender e melhorar e cá estou! (Quase) um ano sem congelador, aqui estou a tentar fazer delícias de ingredientes naturais, biológicos, não processados e saudáveis! Devo dizer que estou no bom caminho (pelo menos sabe bem!) ;)
****
Truth be told I am not so enthusiastic anymore about Halloween. It is true that I like the idea that on this day&night the witches are among us, but at the same time I wonder if it is not just another way to induce and encourage buying and waste.. Around a decade ago, more or less, I think I started celebrating it and I always did my own costumes, either using my old clothes, used or bought 2nd hand or even made out of cardboards and other materials and I always had fun doing them. Just like for Carnival, I never bought any costume and if I have to buy some accessory, I have a box where I keep all of them and throughout the years I go there and search for something I can use again! I recycle and I Re-use! #ZeroWaste
But what I like the most in any holiday, is that it is always a good excuse for me to cook something different! :) Now I tried a "Raw Pumpkin Pie". I had done before another raw pie for my birthday and I was marveled by the simplicity and how easy it is to do. And obviously, the taste of it!! I have been checking out and following some healthy style/healthy recipes blogues and youtube channels and I found this one out. It has really simple and easy recipes, healthy and full of flavour. It is worth it to check it out! And it inspired me to make this raw pie! The pumpkin I used is an Hokkaido, orange-Halloween-colour, organic! Nowadays it is easy to find it everywhere, but for this recipe you can use any type of pumpkin.
Here is the recipe if you want to try it out e please feel free to change nuts ou spices! Give it your personal touch, that is the idea and beauty of cooking! ;)
Raw Pumpkin Pie (Serves about 10)
- Ingredients
8 dates, pitted (soaked in hot water for about 10 minutes)
1/4 tsp vanilla extract (I made my own with Russian vodka, yummy!)
1/4 tsp salt
1-2 Tbsp water
Filling:3 cups shredded pumpkin
1 1/2 cup coconut milk
20-25 dates, pitted
1/2 cup sweetener (I used honey)
1 Tbsp vanilla extract
2 tsp ground ginger
2 tsp ground cinnamon
1 ts ground nutmeg
1/8 tsp ground turmeric
1/8 tsp salt
- Directions:
2. Add the remaining ingredients and blend until ground but easy to retain shape with fingers, add bits of water, if needed - put the mix in a round 20 cm diameter baking tray, covering uniformly the bottom and walls of the baking tray. Reserve.
3. Filling: Peel and remove seeds from pumpkin (they can and should be toasted to have a great, amazing snack!) and shred in a kitchen robot.
4. Add all the remaining ingredients and blend until you have a smooth texture. Put on top of the crust and refrigerate, for a minimum of 6 hours or overnight. Add toppings of choice.
Beautiful and tasty!!!!
And no waste! With what is left from the pumpkin, because I bought a big one, I will still do a soup and a curry with potatoes!!
Today is a nostalgic day, it makes me wonder back to 5 years ago when I came to live in Helsinki.. At the beginning it was just amazing! Despite coming here since earlier years, I came and live more definitely here and the day I arrived started snowing. It was a good winter, not so typical for the south of Finland to snow that early, but good because it started snowing in October and that year it was a white X-mas, full of snow and beautiful! Of course, that increase the euphoria and excitation, especially because, me bring from Lisbon, never had seen snow before!! This year there is no snow yet and the feelings are more calm.. Each time missing Portugal more and more, but I distract myself going to the kitchen and trying new things!
Nostalgia goes on. Almost one year ago I started this blog because my freezer broke. I still don't have one, I did not fix it and I have been managing quit well, surviving without it! It forced me control the amount of food I buy, in order to avoid waste and the cooking still needs a bit of work - somehow I have this idea that 3 more people live with me so I cook ridiculous huge amounts of food!! And during this year a lot of things happened and a ton of adventures, the summer was particularly hard to endure, I couldn't buy icecreams, because either I would have an overdose for eating too much icecream or it would go to the garbage, melted, because I couldn't it all and I reduced the amount of smoothies, with frozen fruits, as well. But I was finding alternatives, always testing, going wrong, learning and improving and here I am! After (almost) one year without freezer trying to make delicious things out of natural ingredients, organic, non-processed and healthy! I must say I am in the right track (at least it tastes good!) ;)